Payscan Workflow Dashboard, temporary PO Receive location details
Tech Alert: Payscan Workflow Dashboard, temporary PO Receive location to be implemented by 11 a.m. today, Thursday, March 2
We are aware of the performance issues within the PayScan Workflow Dashboard. In the interim, we are removing the PO # Column which will speed up the site performance. This change drastically reduces the amount of time it takes this Dashboard to load (from minutes to seconds) and will allow you to move items through the workflow approval process without delays.
Please contact AST@Essex.com with any questions you may have.
Payscan Workflow Dashboard, temporary PO Receive location: The PO # column is where you typically go when the workflow step identifies that the PO needs to be Received. This column has been removed, so please follow the steps below to easily receive Purchase Orders from within the Workflow Dashboard.
(For a larger view of the below screenshots, right click on the image and select "Open image in new tab.")
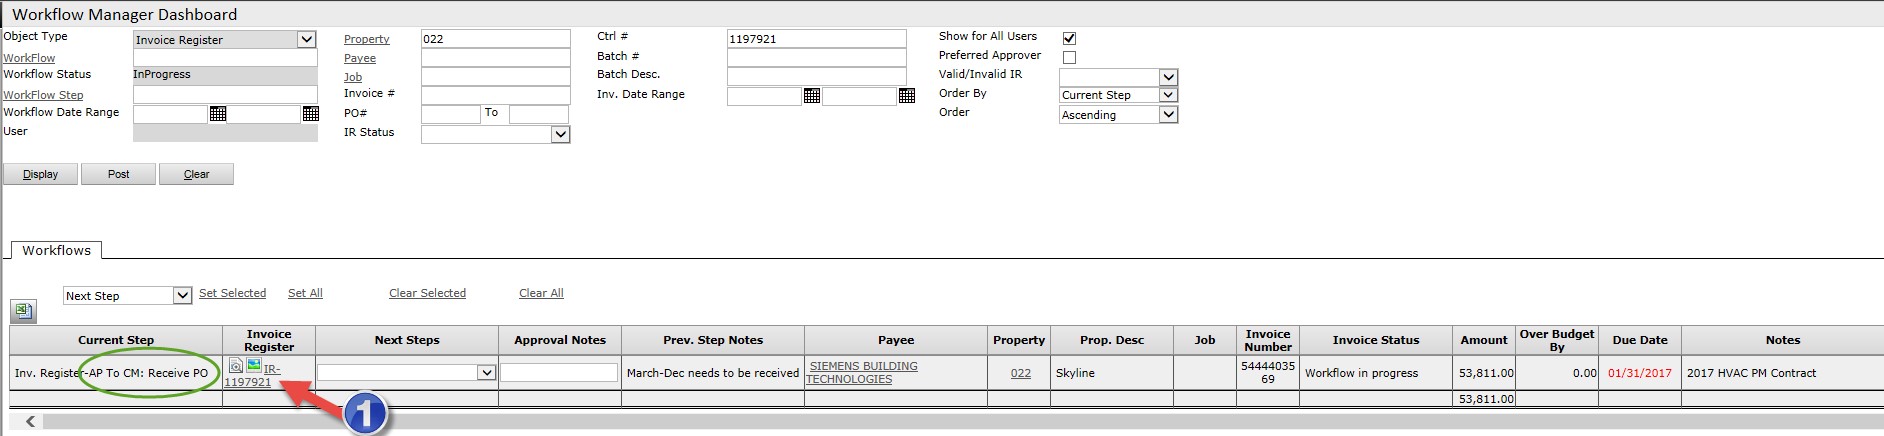
1. Click on the IR link within the line item needing the Purchase Order addressed. In this example, you see the PO needs to be received.
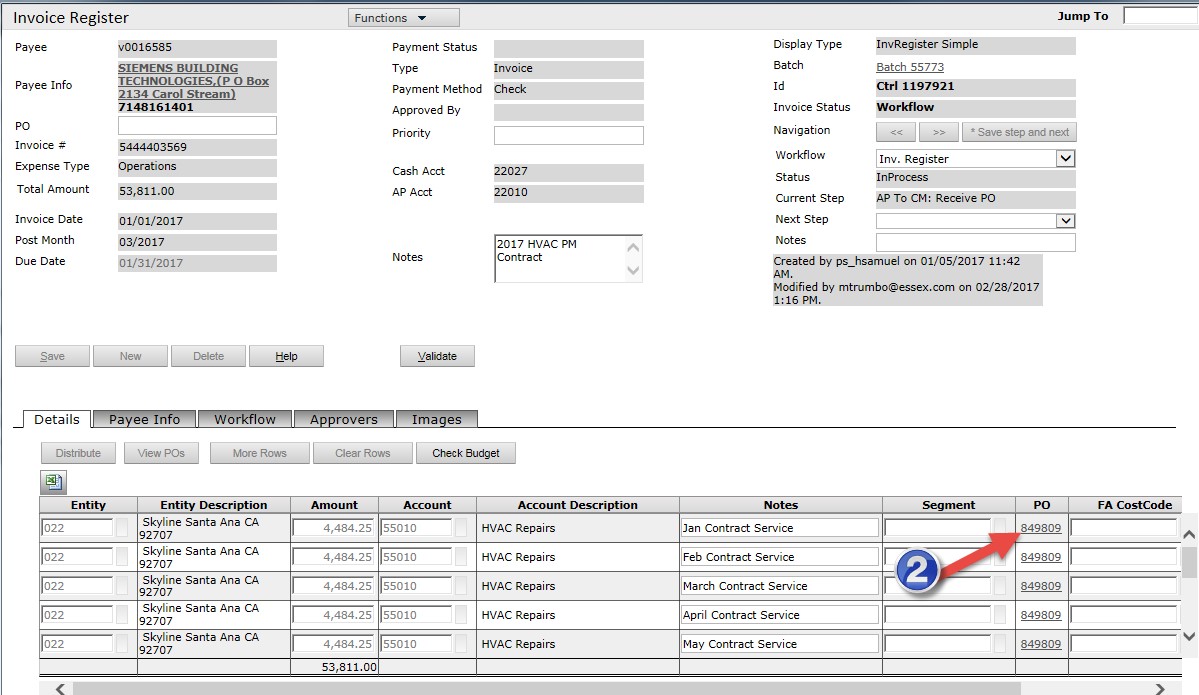
2. The Invoice Register screen will display in a new window. Within this screen, click on the PO link.
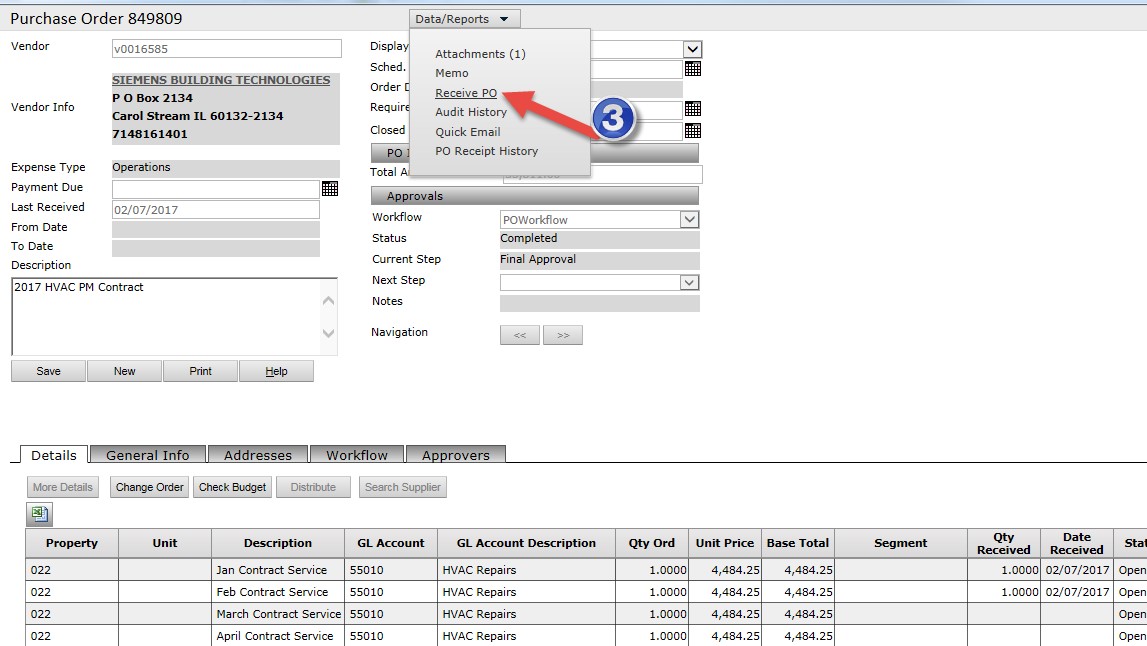
3. The Purchase Order will display. Within this screen, go to the Data/Reports section and click on the Receive PO link.
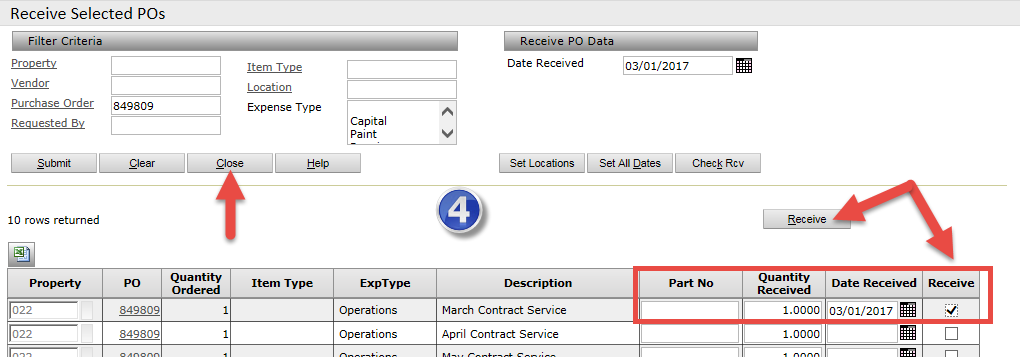
4. The Receive Selected PO screen will display. Within this screen, Receive the appropriate line items and click Close and close the window.
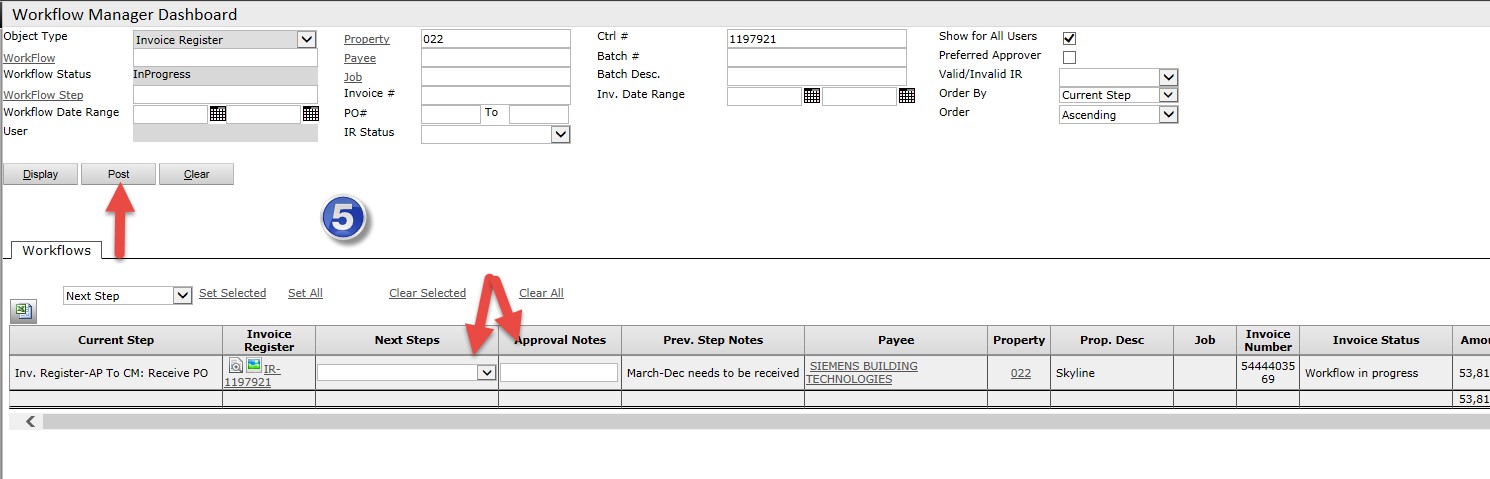
5. Once the Receive window is closed you will be back on the Workflow Dashboard. Be sure to select the appropriate Next Steps, enter Approval Notes and click Post to move the Invoice Register forward in the workflow.
Thursday, March 2, 2017 - 10:45